Defects
Written By Nira.app
Last updated About 3 hours ago
Defect callouts use 3D Callout - Defect Window in the 3D viewer or 2D Callout - Defect Window in the photo viewer. When a user clicks a Defect callout, the following window is displayed:
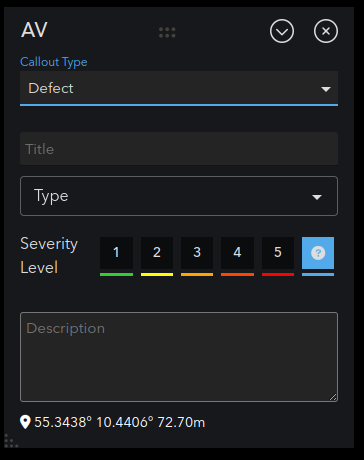
Users with view-only access to the asset can read this information, but they cannot change it.
Use the annotation's option to copy its URL to the clipboard. Opening that URL navigates to the annotation's bookmarked view.
- Title: Shown beside the callout in the layer list window and in the 3D view when using the "Title" Callout View Style. Also shown in the PDF Inspection Report.
- Type: Shown in the PDF Inspection Report.
- Severity Level: Shown in the PDF Inspection Report. Also controls the color of the callout in the 3D view and its icon color in the layer list window.
- Description: Shown in the PDF Inspection Report.
If the defect was created with the photo viewer's Create Annotation tool, the Type or Title will appear above the callout's rectangle in the photo viewer, and the Severity Level will control the rectangle's color.
The dropdown in the window's upper right corner also offers several functions:
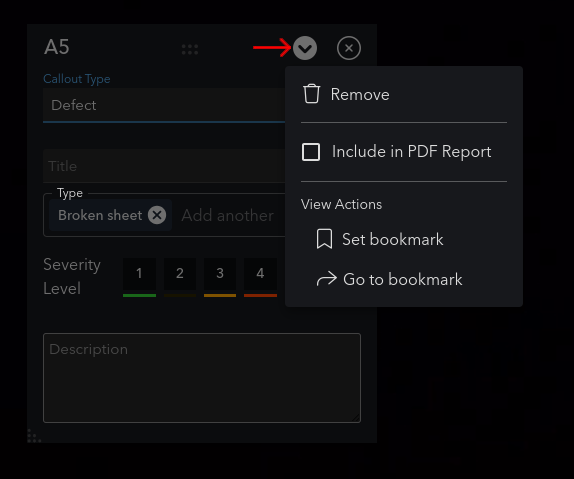
- Remove: Deletes the callout.
- Include in PDF Report: Controls whether to include this defect in the PDF Inspection Report. Callouts created with the photo viewer's Create Annotation tool are always included in the report, so this option won't appear for them.
- Set bookmark: Captures the view's current position for later usage with the Go to bookmark button. This menu item is only available for callouts created with the 3D callout tool, not for callouts created with the photo viewer's Create Annotation tool.
- Go to bookmark: Immediately shifts the 3D view to the position saved using the Set Bookmark button. This menu item is only available for callouts created with the 3D callout tool, not for callouts created with the photo viewer's Create Annotation tool.