Performing Photo Inspection
Written By Nira.app
Last updated 2 days ago
Prerequisites
An asset with a 3D model (mesh, point cloud, or both) and complete photo and pose data already uploaded — see Uploading Photo Inspection Data.
Calibrated photos with camera alignment data, or a laser-scanner E57 with embedded panoramas, or equirectangular panorama images paired with a pose file.
Plan tier: Photo Inspection is available on all plans.
Inspecting with synchronized photos and panoramas
Opening the photo strip
Once an asset has photos with pose data, the View Photos button appears in the toolbar. Click it to open the photo thumbnail strip along the bottom of the viewer.
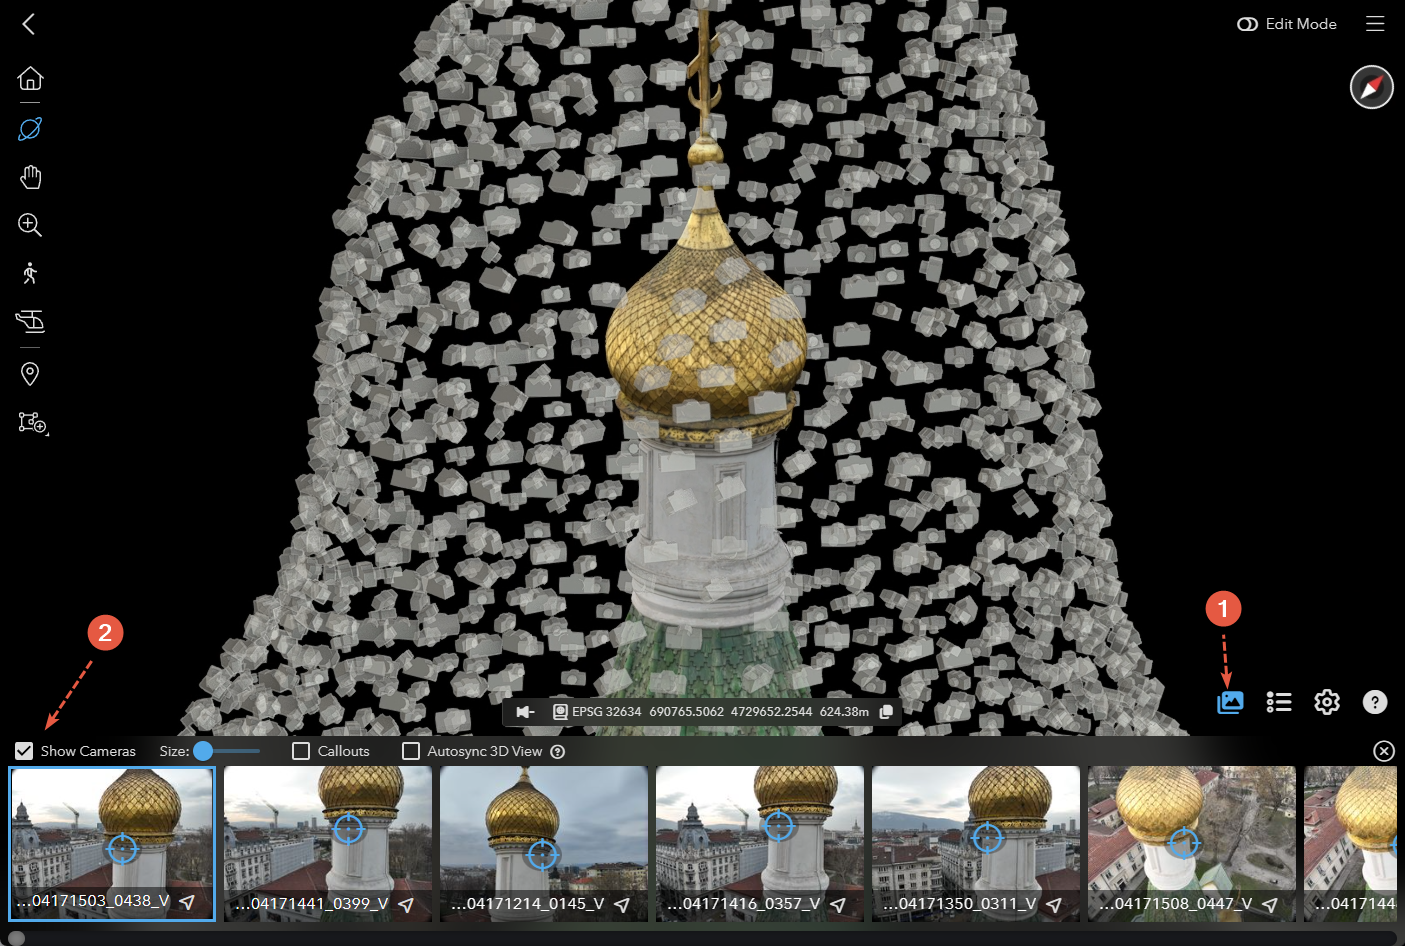
Sync Camera (perspective photos)
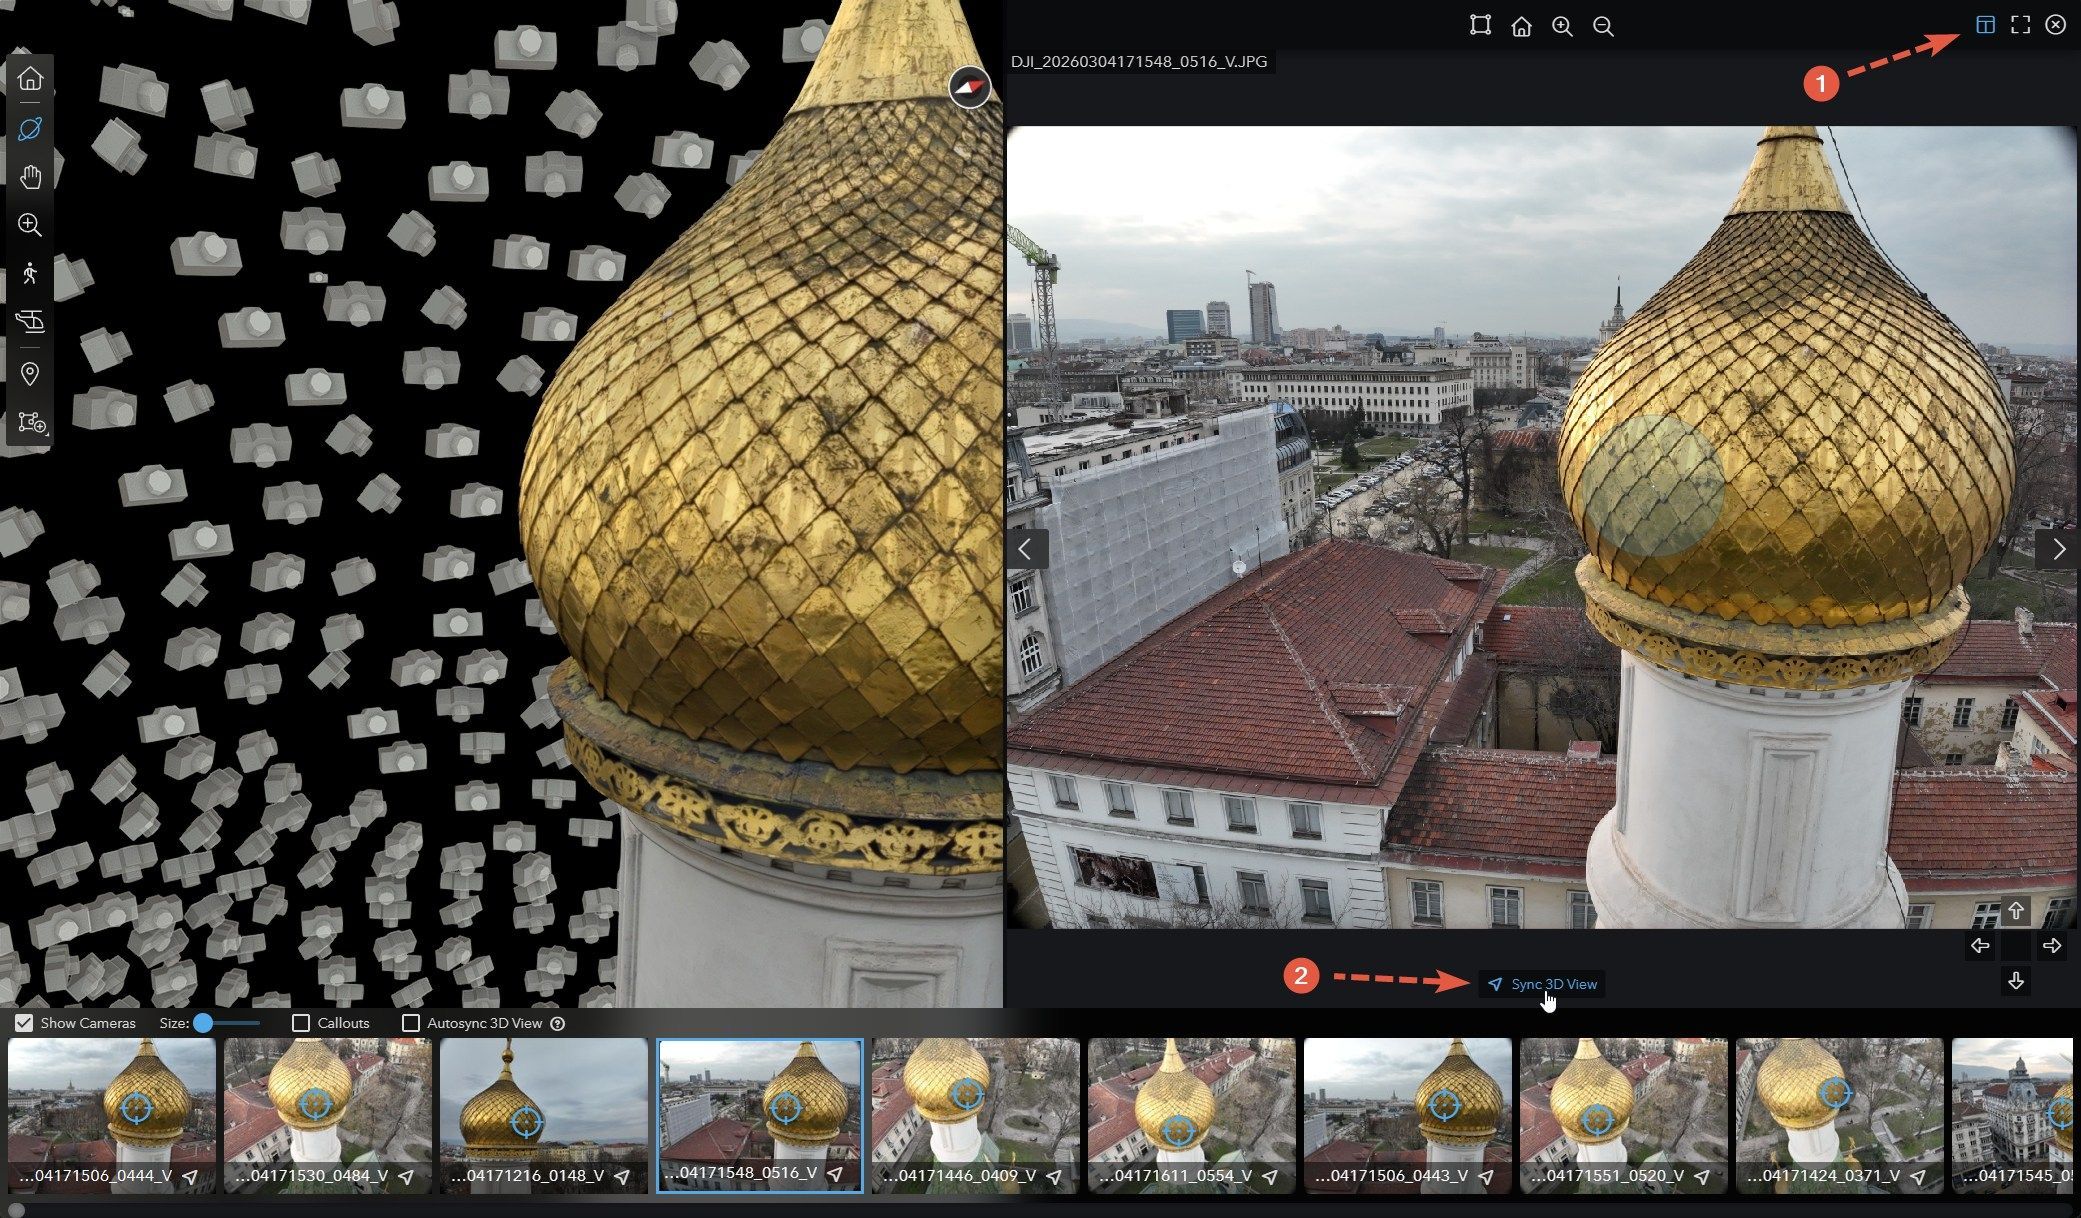
When you click a photo in the thumbnail strip, the photo opens in a larger viewer. To align the 3D camera to the photo's pose:
Enable Split View at the top of the photo viewer to open a side by side view of the photo and model.
Click Sync 3D View near the bottom of the photo panel. 3D view rotates and translates so that you're looking at the model from exactly the same position and angle as the photographer.
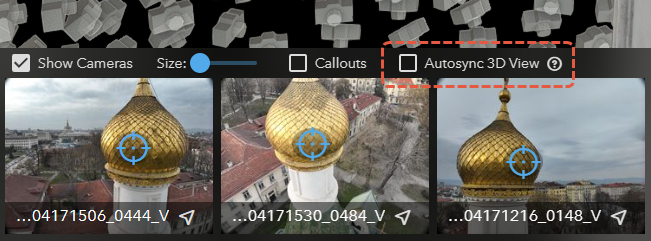
To make this happen automatically every time you switch photos, toggle on Autosync 3D View. With Autosync 3D View enabled, scrubbing through the thumbnail strip becomes a guided tour through the capture session.
Bubble view (laser-scanner panoramas)
Bubble view is the panorama-viewing mode used for laser-scanner setups. It works differently from the perspective-photo flow above.
When an asset contains panoramic imagery, each scanner position appears as a clickable marker in the 3D scene (typically rendered at the scanner's tripod location).
Click a scanner-position marker.
The viewer enters bubble view at that pose. You can look around in 360°, but you stay anchored at the scanner's position.
Switch between bubble view and the regular 3D fly-through using the bubble-view toggle in the viewer toolbar.
ℹ️ Note: Bubble view does not use the Sync Camera button. Entering bubble view is itself the sync action — clicking a scanner marker places you at that pose. There is no "sync" / "unsync" toggle; you exit bubble view by ESC on your keyboard or selecting a new marker.
Adding callouts to photos and generating Inspection Reports
Photos and bubble views both support callouts for inspection workflows:
Open a photo or bubble view.
Click Add Callout, then drag a rectangle around the area of interest.
Set the callout type (Defect, Measurement, or Annotation).
Repeat across as many photos as needed.
To generate a PDF Inspection Report from the callouts:
Enter Edit Mode.
Open the hamburger menu and click Generate Report.
When generation finishes, click Download Report.
Only callouts of type Defect or Measurement appear in the PDF. Annotation callouts are excluded by design. See PDF Reports for full report customization options.
Troubleshooting
Problem: Photos uploaded but Sync Camera button doesn't appear.
Cause: Nira didn't receive pose data, or filenames in the alignment file don't match the uploaded photos. Fix: Check that you uploaded the camera alignment file (CSV / TXT / XML) in the same upload as the photos and the model. Open the alignment file in a text editor and confirm the photo filenames match exactly — including extension and case. Re-upload as a new asset version if needed.
Problem: Sync Camera button is there, but the 3D view doesn't match the photo when clicked.
Cause: Coordinate-system mismatch between the camera alignment file and the model. Most often happens when the model was re-exported in a different coordinate system after the alignment file was generated. Fix: Re-export the model and the camera alignment file from the same project state in your photogrammetry software, with the same coordinate system selected. Re-upload both.
Problem: Uploaded an E57 but no bubble-view markers appear.
Cause: The E57 doesn't contain embedded panoramic imagery — it was exported as point cloud only. Fix: Re-export the E57 from your scanner software with panoramic imagery included. Faro Scene, Cyclone REGISTER 360, and Leica software all have this as a non-default option in the E57 export dialog.
Problem: Bubble view loads but the panorama is misaligned with the point cloud.
Cause: Scanner setup-to-cloud registration was not refined before export, or the E57 was exported from a project state that pre-dated registration. Fix: Refine registration in the scanner software, then re-export the E57.
Problem: Photos appear blurry or low-resolution in the photo viewer.
Cause: Nira streams photos at viewport-appropriate resolution to keep the viewer responsive. Fix: Zoom in within the photo viewer to load higher-resolution detail. For full-resolution access, enable Allow Photo Download (Share... menu) on Growth and Enterprise plans — see Downloading Source Files.
Technical Notes
What is not supported:
Photos without camera alignment data (they upload, but no Sync Camera or photo-based callouts).
Photogrammetry camera alignment files for software outside the supported list (Nira accepts RealityCapture/RealityScan CSV, Metashape/iTwin/DJI Terra TXT/XML, and ABC/FBX). Other proprietary formats need conversion first.
Bubble view from PLY-as-point-cloud files. Convert to E57 or LAS/LAZ.
Mixed-coordinate-system uploads. Photos, model, and alignment file must all share one coordinate system.
Re-uploading additional photos to an existing point-cloud asset (point clouds cannot be appended). Photos can be added to existing mesh assets.
Plan availability:
Photo Inspection workflow (Sync Camera, callouts, reports): all current plans (Individual, Professional, Enterprise) and Trial. Not on legacy Core/Business plans.
Photo download for callouts: Professional, Growth, and Enterprise plans.
E57 panoramic bubble view: all plans that support point clouds — i.e., Individual, Professional, Enterprise (not legacy).
Coordinate-system reminder: If your photogrammetry or scanner workflow involves georeferenced data, the same coordinate system rules apply across all input paths. See Georeference & Map View and Working with Georeferenced Data for EPSG and CRS guidance.
Performance: Photo and panorama count does not affect viewport frame rate — Nira streams imagery on demand. Asset processing time, however, scales with photo count and panorama count, so very large captures (1,000+ photos or 200+ scanner setups) take longer to ingest. See Diagnosing Performance Issues.
Related Articles
Supported Data & File Types — full format reference, including camera alignment file formats
Point Clouds (E57, LAS/LAZ) — E57 specifics, point-cloud limitations
Web Uploader Guide — how to upload model + photos + alignment together
PDF Reports — generating inspection reports from photo callouts
Callouts (2D Photo + 3D) — callout creation and behavior across photo and 3D contexts
Export guides for camera alignment files: RealityScan, Metashape, DJI Terra, iTwin, Faro Scene, Cyclone REGISTER 360